If you’ve ever run your fingers over a cozy, patchwork printed quilt and thought, “I could make something like that,” you’re not alone. As a Printed Quilt supplier who’s spent 12 years working with fabrics, designers, and everyone from beginner crafters to small boutique studios, I get this question weekly. The short answer is: yes, you absolutely can. The longer, more honest answer? It’s not just about cutting squares and sewing them together—it’s about balancing your vision, fabric science, and practical skill to make a patchwork printed quilt that feels intentional, durable, and uniquely yours. Over the years, I’ve helped dozens of first-timers navigate the process, and I’ve learned that success has less to do with being a master sewer and more with working smart, not hard. Printed Quilt

Let’s start with the part that trips most people up before they even pick up a pair of scissors: choosing your printed fabrics. When I teach beginners, I always say this is the most important step because it sets the tone for every other choice you’ll make. Patchwork printed quilts work best when the printed pieces have visual cohesion—too many loud, clashing patterns will make your quilt look busy, while too many identical small prints will feel flat. I recommend starting with a fabric bundle from a brand that coordinates (many modern print lines are designed specifically for patchwork, so the designers have already done the hard work of matching colors and scales for you) or picking 3-5 prints that share a common color palette. For example, if you love soft blues and greens, you might pick a large-scale floral print, a small geometric dot, a subtle stripe, and a tiny leaf print—all tied together by that same cool color family.
Here’s the science part that most new quilters overlook, and it’s the difference between a quilt that fades in a year and one that lasts for decades. Not all printed quilting fabrics are created equal. When you’re choosing your pieces, check the thread count and the fabric weight. For patchwork, you want cotton fabric—specifically 100% quilting cotton with a thread count of at least 80. Why? Lower thread count fabrics are thin, stretchy, and bleed dye when washed, which means your patchwork pieces will warp, fade, and get messy after a few uses. I’ve seen beginners grab cheaper apparel cotton for their first patchwork quilt, and within two washes, the squares have stretched out of shape and the prints have blurred together. Quilting cotton is woven tightly, so it holds its shape, resists fading from reactive prints, and is durable enough for everyday use on a bed or as a throw. Also, make sure all your prints are from the same dye lot—even two bolts of the same print can have slight color differences if they’re made in different production runs, which will be glaringly obvious once your quilt is assembled.
Next, deciding on the size and layout of your quilt. This is where your personal style comes in, and where printed patchwork really shines. You don’t have to stick to the classic 12-inch square grid, which is what most people think of when they hear “patchwork.” You can mix sizes: combine 6-inch squares with 10-inch rectangles for a more dynamic, modern look, or use printed triangles or even irregular shapes for a bohemian vibe. When I help a new customer design their first patchwork printed quilt, I suggest mocking up the layout on a design wall (even a blank wall works if you don’t have a proper one) by laying out your fabric pieces on top of butcher paper. Step back 3-4 feet and take a photo—this helps you see if the colors balance, if any print is dominating the design, and if the overall pattern feels pleasing. Don’t be afraid to rearrange pieces multiple times; some of my favorite customer quilts started with a layout that felt off until we swapped two prints.
Now, the actual construction of the patchwork top. This is where a little patience pays off, and where many beginners get frustrated. The key here is precision—sewing a ¼-inch seam allowance is non-negotiable. If your seam is even slightly wider or narrower, your patchwork squares will be different sizes, and when you go to sew the rows together, everything will pucker or gap. I recommend using a ¼-inch presser foot on your sewing machine, which is designed specifically for this, or even masking tape on your machine’s bed as a guide if you don’t have one. When sewing the pieces together, press your seams open or to the side as you go—pressing is not optional, it’s the secret to a smooth, flat quilt top. If you press seams to one side, your quilt will have less bulk, which is especially important if you’re working with many layers of fabric from multiple prints.
Wait a second—what if you don’t want to sew? I hear this a lot from people who love the look of patchwork printed quilts but can’t, or don’t want to, operate a sewing machine. Here’s a little known trick in the quilting world: iron-on interfacing or fabric adhesive. You can cut your printed fabric into your desired shapes, lay them on a backing fabric, and fuse them in place with a hot iron, no sewing required. The result looks just like a patchwork quilt, and it’s perfect for wall hangings, table runners, or small throws. For larger quilts, though, I still recommend sewing—hand sewing has a charm, but it’s time-consuming, and machine-sewn patchwork is more durable for everyday use.
Once your patchwork top is done, you’ll need to layer it with batting (the middle, fluffy part that makes quilts warm) and a backing fabric. For a beginner, I suggest a mid-weight cotton batting—too thin and your quilt will feel floppy, too thick and it will be hard to sew through. The backing fabric can be a solid color from the same print line as your patchwork, or even a coordinating large-scale print—just make sure it’s the same quilting cotton as your patchwork pieces so it doesn’t stretch. Now, the final step before binding: quilting the layers together. This is what holds the batting and top in place, and you can do simple straight lines, cross-hatches, or even stitch along the seams of your patchwork squares to highlight your printed pieces. If you’re new to this, a simple all-over straight stitch is the easiest and most forgiving method.
I should also address a common concern: cost. A handmade patchwork printed quilt can be a big investment, but it doesn’t have to break the bank. If you’re buying individual fabric pieces, you’ll need 3-5 yards total for a twin-size quilt, which is usually $50-$100 depending on the print line. Add batting and thread, and you’re looking at $70-$120, plus the cost of your time. Compare that to a store-bought patchwork printed quilt, which often uses low-quality fabrics and mass-produced prints that won’t last. The upside of making your own? It’s one-of-a-kind, exactly the colors and size you want, and you’ll have the satisfaction of using something you created.
Wait, but is there a case where it’s better to work with a professional instead of making your own? Absolutely. If you want a custom patchwork printed quilt with heirloom-quality details, or if you have a specific print line that you can’t find in stores, collaborating with a supplier who specializes in custom printed quilts is a great option. When I work with a customer on a custom patchwork quilt, we start by picking their favorite prints, adjust the layout to their needs, and ensure every seam and detail is perfect—so they don’t have to worry about mistakes that could ruin months of work. For example, a customer recently came to me wanting a patchwork quilt with prints from their grandmother’s old fabric stash that was fading; I scanned and restored the prints, then turned them into a custom patchwork quilt that felt personal and durable.
Over the years, I’ve seen beginners go from cutting their first square to finishing a full twin-size quilt, and the pride they feel is unlike anything else. The most important thing to remember is that mistakes are part of the process. You’ll sew a seam that’s too wide, you’ll cut a square the wrong size, and your first quilt might not be perfect—and that’s okay. Every quilter, from the casual hobbyist to the most famous designers, has a stack of “practice” quilts that didn’t turn out as planned, and those lessons make your next one even better.
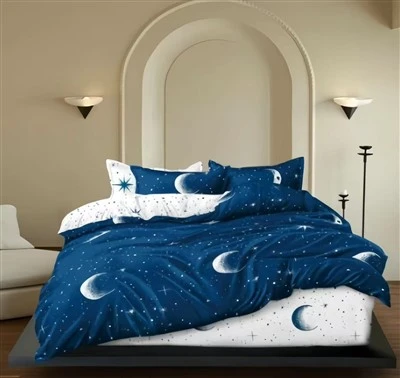
If you’re ready to take the leap and make your own patchwork printed quilt, start small. Don’t jump into a king-size quilt first—try a wall hanging, a table runner, or a baby blanket to practice your skills. Choose a simple layout with 6-inch squares, pick a 3-print color palette that you love, and go at your own pace. And if you want to skip the learning curve or create something truly custom, we’re here to help with any custom printed quilt needs. Don’t hesitate to reach out to discuss your vision, size requirements, or print preferences—we’ll walk through every step to bring your patchwork quilt idea to life.
Printed Quilt References:
- Design Essentials for Modern Quilt Making, the Quilting Association of America, 2021
- Textile Science for Apparel and Home Furnishings, 6th Edition, Fairchild Books, 2019
- The Beginner’s Guide to Patchwork Quilting, Landauer Publishing, 2020
- Durability Testing of Printed Quilting Cotton Fabrics, Journal of Textile and Apparel, Technology and Management, Vol. 12, No. 3, 2022
Haining Jiahao Supply Chain Co., Ltd.
As one of the most professional printed quilt manufacturers in China, we have world-leading production equipment and strong manufacturing capabilities. Welcome to wholesale bulk cheap printed quilt in stock here and get quotation from our factory. Customized orders are welcome.
Address: Room 903, Building 4, Hongxiang Life Plaza, No. 267, Nongfeng Road, Haining City, Zhejiang Province, China
E-mail: cecilia@jiahao-hn.com
WebSite: https://www.jiahaotextiles.com/
